Give your workshop a strong backbone!

From Learning Journey to Thematic Building Blocks – Part 3 of the ‘How to Plan a Training’ series

Ever wondered how to narrow down all the content you want to cover in a seminar or training? How to use good aims and objectives to develop topics and concepts for a training? Or how to translate the learning journey in actual blocks of content that you can dedicate sessions to? If you sais yes to any of those questions, this is your blogpost! Intro

In this blog post, I will guide you through the process I use to define the Thematic Building Blocks for a training. What those are I will explain in a moment, but first I want to set the scene, where in my four-step approach to planning an educational activity we are.

In the first part of the ‘How to plan a training’ series, I took you through the steps necessary to define laser-sharp aims and objectives. Check the post out for more information! In short, you need to focus on keeping your objectives as specific, achievable and realistic as possible. Next, in part 2, we looked at those as the different elements for a successful learning journey you want to take you participants. Check here for more details, but in short, I offered you three different approaches to create a draft agenda. The first one was focusing on a logical order of the objectives. The second looked on the development a participant will go through during the event. And the third referred to the hero’s journey my facilitator friend Bastian Küntzel over at Incontro proposes in his book ‘The Learner’s Journey – Storytelling as design principle to create powerful learning experiences’.

Now that we have aims and objectives as well as a draft agenda, we want to combine those with the overall content of the educational activity. For that, I want to offer you the following analogy:

Give your workshop a strong backbone!

Imagen the human spine. It’s an intricate system of different parts that all serve a different purpose but are all essential for us to stand, sit, walk around or do any kind of activity with our body. Same goes for the success of an educational event and the equivalent to the bones of our spine – the vertebrae – are the Thematic Building Blocks.

Those are all the different pieces of content you want to cover during an educational activity. These can be concepts and terms as well as skills or attitudes you want participants to master or reflect on. They are predefined by the aims and objectives as well as the learning journey and will give you the frame to develop the concrete sessions.

Let’s see how we can come up with them by using an example:

We are planning a training on climate change and its social impacts. It will consist of eight sessions, and the participants are youth activists that work on a local level with displaced people. 

As learning aims, we have formulated the following:

  • Participants explore the social impact of climate change.
  • Participants can articulate the connection between this impact and displacement.

As objectives we set:

  1. During the training, participants gain knowledge regarding the effects of climate change in rural communities in the global south.
  2. Participants develop displacement profiles through case studies.
  3. Participants explore the connection between climate change and displacement.
  4. Participants learn about reasons for displacement by building on each other’s expertise.
  5. Participants present the social dimension of climate change to stakeholders in the decision-making process.

The narrative of the learning journal would be: 

Participants work on reasons for displacement, starting from their own experience on the local level. Next, they are taking it to the global level, generalise it and add the impact of climate change to their perspective. They close the activity by bringing it back to the local level and formulate the tangible effect it has in their municipalities.

To start, I would look for keywords in both the aims and objective but also especially in the learning journey. These can be important concepts or terms which need definition or summarising titles that need to be untangled. Below you can see what I would identify for our examples:

  • Climate Change
  • Displacement
  • Local context
  • Global Context
  • Social impact
  • Rural community
  • Stakeholder

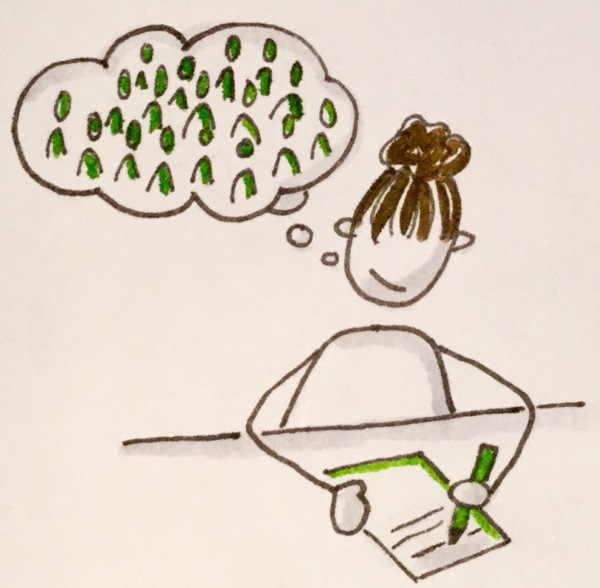
As concepts like climate change and displacement are enormously huge, I would create mindmaps to further dissect those terms and concepts – always keeping it in the context of the training focus.

Give your workshop a strong backbone!

Looking at the different mindmaps, I would try to identify intersection and interesting aspects but would also start crossing out ‘irrelevant’ tangents.

Give your workshop a strong backbone!

Referring back to the learning journey I defined prior, I would attempt to arrange the different aspects in corresponding order. At this stage, I would also decide if there would be a need an adjustment in the learning journey to fit this analysis. The ‘essential’ building blocks and those specific for this educational event would be added in at this stage. 

Give your workshop a strong backbone!

These are the Thematic Building Blocks! As mentioned before they represent the general flow of the different sessions. What needs to be done now, would be to define how many sessions will be dedicated to each building block and what will be the focus (speak aims and objectives ;)) of each of the session. I usually use the same approach here as I would for the aims and objectives for the overall activity. Check out part 1 of the ‘How to Plan a Training’ series if you want to learn more about this process.

Risks & traps

Go big or go home is not the right approach here. No matter how interesting an aspect in your mindmap is if it does not fall into the scope of the activity, you have to let it go. Also, be aware that a connection that appears entirely logical to you might not work for someone else. Keep this in mind when moving from your building blocks to the methods in the next step. Participants must be able to establish these connections in how you translate down the learning journey and building blocks into the methods.

Some pro-tips

  • Keep it visual: Especially if you work in a team, it helps to establish a shared understanding of the Thematic Building Blocks if you find ways to make them visual. A simple way would be to use post-its and a whiteboard. 
  • Get a second perspective: If you working on your own, you could share your building blocks with a friend or family member to check the logic. Maybe you even have a topic expert in your network. Get their input to the mindmap – but don’t forget to narrow it down afterwards again.

So, what do you think about this step in planning a training? Do you have a different approach or a question? Leave me a comment below. Also, it would help me out if you like and share this post with our fellow trainer friends!

In the next and last part of the ‘How to plan a training’ series, I will show what I think is essential when picking the final methods for your sessions. Stay tuned!

Love and appreciation,

Anuschka

Turn on the right light – How to work with an expert

Have you ever been in a workshop and an expert bored you out of your mind? They had important stuff to say, but there was no process behind it? Did you maybe even wondered why they are there in the first place? That happened to all of us at least once.

As a facilitator, we sometimes have to work with experts during a learning event. Most of the time, this decision is not in our hands, but how we work with them definitely is. I am convinced if well prepared the above horror scenario can be absolutely avoided! In this IMG_0104blog post, I will present you with different types of experts you might encounter and walk you through how to work with them in different settings.

I differentiate between three types of experts. First, there is the floodlight expert that loves to be in focus and floods the participants with knowledge like the floodlight the soccer field. On the other end of the spectrum is the living room lamp expert. This expert feels awkward being in the spotlight. They prefer to shine their light from the background like the lamp behind your couch. And finally the flashlight experts. They feel comfortable navigating an educational space and know where to spot their light while leaving other aspects in the dark.

img_0979

The floodlight

The floodlight expert needs the stage. They will take up space no matter what and will speak and behave like THE expert. That might lead to the expert explaining to the participants by flooding them with facts. It also could establish their views as the only correct IMG_0107ones. This kind of expert can operate from a spot of entitlement and often is pushed on you by your client. There is the risk that this expert will take over control of the session as you might not have the ‘authority’ to set up sharp boundaries.

Working with a floodlight expert can be a challenge and has to be handled with some artfulness. Especially if the client insists on the expert. In this case, I work with the client on a clear framework for the expert’s presence. What do they add to the event? In what role will they participate? What are the power relations? After that is clarified, I would present to the client candid which processes are possible in that frame. I would also speak about what role I can take during the event to not create tensions with the expert. If the expert and their input were the main focus of the session, I would suggest that I either moderate the conversation or step back and conduct a Graphic Recording.

IMG_0101In a one-session-learning-event, there is not much more you can do than the above. It really depends on the frame the client sets. If I take the role of the moderator, I sit down with the expert beforehand to clarify the process and look at the questions I would ask. In the case of the Graphic Recording option, I would only passively participate in the session. Nevertheless, it still could be my responsibility to open and close the overall activity.

IMG_0102For a multi-session-learning-event, I often use the sessions before the expert’s input to prepare it with the participants. For that, I would look at what knowledge or attitude they need to build to interact productively. Sometimes, I even work with the learners to formulate questions, that have the potential to increase the relevancy of the input. After the presentation, I usually would debrief the session. For that, it would be best if the expert leaves after they are done. The group would have the chance to voice their opinion on the expert in a safe space and reflect on the content. That makes it easier to build on it in the remaining time.

IMG_0103I would similarly work in a multi-day-learning-event. The point in the learning journey in which the expert would join is crucial. When does it support and not interrupt the process? How can we build up towards it? If the moment depends on the schedule of the expert, I check if I need to redraft the journey itself. Putting an input at the beginning of the event could lead to the participants adopting the views of the expert. I would try to avoid that on any cost. If the group worked already on the topic, they would feel more comfortable to disagree with or challenge the expert.

img_0979

The living room lamp

The living room lamp expert blends in just like the actual lamp in your living room. They IMG_0108might even ask you to join the participants throughout the learning event and feel awkward being put into the focus. They often do not establish themselves as an expert and inputs might be diffuse. That opens the risk for a conflict of views if you have a really dominant participant or that the group does not really know what to do with the input. Unfortunately, this kind of expert is often young and/or female. 

I usually aim to work really close together with this kind of expert in the preparation. The more they feel integrated into the development, the more they appreciate the setting. It also helps to gain a clear understanding of their specific expertise to support them to integrate effectively. If they still do not feel comfortable and prefer to be an expert participant, I try to find small group methods with a lot of rotation of the members. This way, as many participants as possible, can have conversations with the expert.

IMG_0101One way, I include a living room lamp expert into a one-session-learning event, is to let them (co-)facilitate one activity. That could be the moderation of a group discussion or guiding a simulation within the specialisation of the expert. To support them and the group, it helps to give them very explicit guidelines regarding the content and the context of it. The earlier they get this briefing, the easier it will go, and both of us have the opportunity for bilateral feedback beforehand.

IMG_0102For a multi-session-learning-event, I would look at the possibility to give the expert a kind of consultant role. Let’s say, part of the sessions is to develop roadmaps for follow-up actions. Let the groups present their first drafts to the expert. They then give feedback and advice, which the groups afterwards have time to consider and integrate into the final draft. Another way is to let the expert follow a simulation up with a reality check. How does the simulated situation look like in real life? What are the options that the different roles actually have? I also sometimes let them simply go around during a group work phase, where they challenge the different groups.

IMG_0103For me, an ideal option for a multi-day-event is to work with this expert throughout the entire time in a co-facilitator relationship. That will allow the participants to build a connection with the expert and feel comfortable to ask them questions and vice versa. It is also convenient for me as I can tap into their knowledge for the preparation. Nevertheless, this option needs some sensitiveness for how the roles are established. The expert needs to remain a resource person than a knowledge authority. 

img_0979

The flashlight

The flashlight expert only shines their expert-light on specific aspects that will further IMG_0106the process. They often have an educational background or at least are experienced in the setting. They usually are aware of the space they take and incorporate the learners’ discussions into upcoming inputs. So, if that does not happen, the different moments of the expert might seem disconnected. This kind of experts can also stir your process in an unplanned direction.

This expert is a juicy one to work with – so many opportunities! I really love to use this expert like an actual flashlight. Before the event, I would sit down with them and see with them what are crucial moments or aspects they can shine their concentrated light on. That makes it really easy for me to guide the process and for them to focus and challenge the preconceptions of the participants.

IMG_0101Nevertheless, in a one-session-learning-event, this approach is a bit tricky to implement as it takes up some time due to the multiple inputs. Here I would see with the expert if they have one aspect that is really crucial for the topic of the event. They would then focus on that, and I would guide the group into diving deeper.

IMG_0102For multi-session-learning-events, I prefer to have this expert with us for the entire time. This way, I can weave the different inputs really deep into the programme and build them up on each other. The preparation with the expert is hugely crucial here. I need to be sure that they stay on track and do not go off on a tangent. Also, I always have an eye on the time and stop the expert when necessary. After all, it is about the participants, not them.

IMG_0103I would dedicate one specific day for the expert to come in and integrate them similar to above. It is essential to establish an understanding among the participants why the expert joins the group. This way, I can lower barriers and support the group to open up to them. Should the expert participate for more than a day, it is crucial to make sure that they do not take over the educational process. They are joining as an expert, not as a facilitator no matter their experience. That is needed to create clear roles and not disrupt the participants. I usually give them space for feedback and input in the preparation to honour their educational skills and knowledge.

img_0979

So what do you think? Here are the main takeaways:

  • Get your client into the clear: Check with them what is their expectation for bringing the expert. Sometimes there is a strategic reason behind it, and you do not want to cross them there.
  • Be frank and honest: You must be really precise with both your client and the expert. The better each partner knows what and how it will happen, the smoother the activity will go. And the more they understand the reasons behind it, the less resistance will be there.
  • Preparation is key: When the expert knows, what is expected when from them, the better the cooperation works. Also, a proper groundwork will allow you to get the most educational value out of an expert.
  • Adjust to the type: Use the expert strategic. This way, you make sure they do not accidentally sabotage the activity.
  • And as always, be the advocate of your participants!

What are your tips and tricks to work with experts? Did you have a difficult situation with an expert and no clue what to do?  Let me know in the comments below. 

Also, it would help me out if you like and share this post with your fellow trainer friends!


Love and appreciation,

Anuschka

Let me take you on a trip! – From the objectives to the design of a learning journey – Part 2 of the ‘How to plan a training’ series

All good experiences have a journey to it. That is true for your favourite movie or book, where the heroine goes from insecure and reluctant to brave and genius. The impact of the challenges and the support of companions along the way is essential for this. Same goes for a day in a theme park, where you go from the idea and planning to a fantastic memory. 

I approach the planning of educational activities in the same way. That is not just true for the overall process but especially for the phase where I translate objectives and outcomes into a general draft schedule. IMG_0976

In the first part of the ‘How to plan a training’ series, I took you through the steps necessary to define killer objectives and outcomes. Check the post out for more information! In short, you need to focus on keeping your objectives as specific, achievable and realistic as possible. It will not help you to set some wage goal like ‘participants will look at different mindsets’. Better is something like ‘participants explore how four different mindsets are affecting a person’s personal development during adolescence’. That gives you actual guidance for further development. Also, your client understands if you are walking in the right direction.

IMG_0989Once you have hammered that out, you need to look at the transformation you want the learner to go through. What is the learning journey you want to design? Who are they going into the activity and who are they going out? What experiences and challenges will support them along the way? Where do you want them to start working and towards what?

I approach this process through different lenses. Those depend on the context and content of the educational activity and the target group of participants. Is the content either entirely theoretical or skill-based, I would see how I can logically connect the learning outcomes and objectives. When the activity is more about self- or topic-exploration, or the participants are non-experts, I would go down the road of participant or topic development. Of course, you can reverse or mix the approaches too.

img_0979

Let’s look at these two approaches using an example:

We are planning a training on climate change and its social impacts. It will consist of eight sessions, and the participants are youth activists that work on a local level with displaced people. 

As learning outcomes, you have formulated the following:

  • Participants explore the social impact of climate change.
  • Participants can articulate the connection between this impact to displacement.

As objective you set:

  1. During the training, participants gain knowledge regarding the effects of climate change in rural communities in the global south.
  2. Participants develop displacement profiles through case studies.
  3. Participants explore the connection between climate change and displacement.
  4. Participants learn about reasons for displacement by building on each other’s expertise.
  5. Participants present the social dimension of climate change to stakeholders in the decision-making process.

img_0979

The objective approach

So, building the learning journey from the objectives is a quite straightforward process. First, I check if any objectives need to be achieved before others as they are relying on each other. Looking at our example, I would tackle objectives 1, 2 and 4 before 3 and 3 before 5. 

Next, I evaluate the objectives looking at the group process. Objectives like number 4 would come before number 2. Both look at reasons for displacement, but 4 includes sharing personal perspectives. That helps the group grow together as it gives them a meaningful space to connect while initiating a work process. This gives me the following order: 4 – 2 – 3 – 5 

As objectives 1 tackles a different topic than 4 and 2, it could go before or after. In this case, I would schedule it afterwards, to have the personal exchange at the very beginning. So my final order is 4, 2, 1, 3 and 5.

img_0979

The development approach

Working on the learning journey through the lens of development is almost like drafting a narrative. I start by defining my protagonist, the learner. In our example, these are youth activists that work with displaced people on a local level. That tells me that they will already have a political opinion on the topic and personalised expertise regarding displacement. They might carry frustrations and trauma with them, and their approach to the issue might be more localised and reactive. 

Next, I would decide the flow of my story. Do I want it to go from micro to macro or the other way around? The example gives us ‘personal and general’, ‘local and global’ and ‘practical and theoretical’ as possible pairs. Before I make the final decision, I would have a look objective if I can recognise a pattern regarding these pairs. For me, the objective 5 is deciding. As it involves stakeholders ‘local and global’ makes more sense. The order depends on the kind of stakeholders and on which level they are included in the decision-making process. Let’s assume that they are stakeholders on the municipality level. As also the participants are working in localised realities, my proposal for the flow would take the pattern of ‘local – global-local’. 

My narrative for the learning journal would be: Participants work on reasons for displacement starting from their own experience on the local level. Next, they are taking it to the global level, generalise it and add the impact of climate change to their perspective. They close the activity by bringing it back to the local level and formulate the tangible effect it has in their municipalities.

img_0979

In this example, both approaches let to a similar learning journey, but that is not always the case. I personally prefer the second approach as it really starts with the participants. As I am coming from non-formal education, it is the most crucial aspect in the development of educational activities to put the participants at the heart of it. 

The Learner’s Journey

A third approach goes even one step further in this direction. This one is developed by a friend of mine, Bastian Küntzel over at Incontro. He recently published a book called ‘The Learner’s Journey – Storytelling as design principle to create powerful learning experiences’, in which he uses the hero’s journey as a core tool. The heroes journey is a model that is used in scriptwriting for movies since the 1990s but can be found in stories dating back to ancient Greece. I will write an in-depth post just focussing on this model another time and get Bastian on board for a Q&A.

img_0979

Risks & traps

What are the risks when it comes to designing educational activities this way? I think the most significant threat is to get stuck in this stage. Sometimes the wish to find the perfect narrative keeps me from moving on. Also, you need to make sure to consider all aspects – participants, objectives, learning outcomes, client, and so on. And finally, be aware that you need to be flexible with the narrative once you facilitate. There is nothing worth than insisting on your design even though the group needs you to adapt and find another way.

Some pro-tips

  • If you facilitate a multi-day event, give every day a theme and work from there.
  • Once you are done, check in with your objectives. Did you cover everything? Are you able to refine some of them or even add one because you include more?
  • If your client still needs to publish a call for participants, draft your learning journey as a story to attract applicants with it.

img_0979

So, what do you think about this step in planning a training? Do you have a different approach or a question? Leave me a comment below. Also, it would help me out if you like and share this post with our fellow trainer friends!

In the next part of the ‘How to plan a training’ series, I will show you how I work the actual content into the learning journey. Stay tuned!

How to start your planning process – From the topic to the learning outcomes and objective – Part 1 of the How to plan a training series

If you ever received a topic from a client and didn’t know where to start, this post is perfect for you! There are a million parts to cover, and your client has ambitious expectations. In this post, I will show you how to skip the panic and go straight from the topic to learning outcomes and objectives.

img_0977-2In the introduction to my ‘How to plan a training’ series, I introduced you to my four-step process on how I go from a training inquiry by a client to a ready to go training schedule. In this post, we will do a deep dive into the first step.

But before I want to address the elephant in the room. Most people use the terms outcomes and objectives interchangeable and often throw goals into the mix as well. Even in educational science literature, you can not find one consistent definition of these terms. To make this post as useful as possible and not to fall into the rabbit hole of this discussion, we will use the following two definitions.

“A learning outcome is a broader aim of an educational intervention. It does not seem necessary to describe a specific skill or knowledge. It can be covered through more than one objective.”

“An objective is a specific skill or knowledge that needs to be established to ensure a certain learning outcome.”

As we have this out of the way let’s start with part one of ‘How to plan a training’!

So, where do we start? For me, it all begins with an inquiry from a client or an organisation on the search for a trainer. Sometimes I also apply proactively for a training or workshop. In both cases, it is essential that you ask yourself, what can I contribute. Also, check if the client and the topic align with your interests and values. For me, nothing is worse than realising along the way that the expectation towards me as trainer and facilitator are not combinable with my practice and approach.

Next, you ask your client for a summary of the topic of the session and as much technical information as they can give you at that point. Relevant facts that you need to discuss as early as possible include time frame (on day or several days, how many sessions per date, …), venue (space for a circle of chair, small group work, …), aimed number of participants and eventual particular need, work alone or with a co-trainer or an expert and general context of the training (alone standing or part of a more extensive conference, parallel training, organisational relevance for your client…).

Once you received this information, you can start a first brainstorming phase. If you worked on that topic before, begin by listing what you can use from your past experiences. If you never worked on that topic, I recommend starting by looking for training manuals about that topic. I usually throw the following into Google “topic trainer manual pdf”. Don’t go too far at this point as you still have to sit with your client and discuss where she wishes to go with the training, but it lays a good foundation that will let you look even more professional.

IMG_0976The next step is to work with your clients on the learning outcomes. For this, you sit with her and walk through different thematic aspects of the training. I usually start from the organisational context of the training. What role does the topic play for the aims and objectives of the organisation and what shall come out of it? Regarding the topic itself, help her to break it down as specific as possible.

As an example, let’s say she asks you to facilitate a training on climate change for four days with three sessions per day. As long twelve sessions of each two hours feel like right now, they aren’t. One approach to breaking it down would be starting from the organisational context and aims. So let’s say in our example the client wants that the participants come up with awareness campaigns about displacement due to climate change. That give us already four learning outcomes:

  • Participants learn to plan awareness campaigns.
  • Participants discover social impacts of climate change.
  • Participants acquire knowledge regarding human displacement.
  • Participants explore effects of climate change.

From here I would look with the client which kind of participants she expects. If they would be mainly expert, another learning outcome could be “Participants develop solutions to displacement due to climate change.” or “Participants discuss possible stakeholders and their possible engagement in the fight against displacement due to climate change.”. If the participants are grass route activists or school students, the focus could be more on the causes of climate change and influencing factors.

The next steps are to work out the objectives that need to be achieved to ensure the learning outcomes agreed with your client. As we defined at the beginning, objectives are skills and knowledge that once acquired contribute to the fulfilment of one or several learning outcomes of training. Let’s say we look at the learning outcome “Participants discover social impacts of climate change.”. Objectives to reach this outcome could be:

  • Participants learn about the climate change and displacement.
  • Participants discuss the connection between weather phenomena and the livelihood of local communities.

These objectives still appear super vague and intangible. There are a million methods and approaches to formulating more successful and achievable objectives. Many of these theories usually are related to project management and corporate goal setting but can be translated into an educational context. I want to introduce you to two of these technics: SMART and CLEAR objectives.

The first one is SMART, which is also the best established and widely known approach. It’s an acronym standing for specific, measurable, achievable, realistic and timely. Let’s take the objective from before “Participants learn about the climate change and displacement.”

SPECIFIC

The objective is quite general, and many things can be interpreted into it. Let’s try to reformulate it:

“Participants learn how climate change leads to human displacement.”

MEASURABLE

That’s more specific but can we measure if participants achieved this objective?

“Participants can name all causes for human displacement created through climate change.”

ACHIEVABLE

Can the participants achieve this objective within the framework of the training? Do they have all the resources and expertise they need? Let’s refine it all little further:

“Participants can name at least three causes for human displacement created through climate change.”

RELEVANT

Does the objective match the general context of the training? Does it play a role in the context of the participants? Which larger aims does it serve? Okay, one more try

“Participants can use their acquired knowledge about at least three causes for human displacement created through climate change to prepare an awareness campaign.”

TIMELY

A timely objective has a start and end date. If the training you are planning is a singular event, the time frame is apparent. Is the training is part of a multi-event project you can define the time frame in accordance to the likely need of the participants. So our final SMART objective would be:

“Within the training, participants can use their acquired knowledge about at least three causes for human displacement created through climate change to prepare an awareness campaign.”

The second technic is CLEAR. It’s an acronym as well and stands for collaborating, limited, emotional, appreciable and refinable. It’s mostly just in connection with Agile project management as it is seen as more flexible as SMART. Let’s take the same objective from before “Participants learn about the climate change and displacement.” through the CLEAR process.

COLLABORATING

Collaborating objects encourage the participants to cooperate in the quest to achieve it. Let’s adjust the objective accordingly:

“Participants discuss the connection between climate change and displacement.”

LIMITED

For CLEAR an objective needs to be limited in time and content. Therefore, you define a specific time frame in this step and also determine clearer what exactly you want your participants to achieve.

“Participants discuss effects of climate change that lead to human displacement in the framework of a 30-minute panel debate.”

EMOTIONAL

The objective needs to emotionally connect with the participants to tap into their energy and passion. One way to establish a personal connection to work with case studies of people in within the same age group or even an expert in this group.

“Participants discuss the effects of climate change that lead to human displacement in the framework of a 30-minute world cafe debate with youth from affected groups.”

APPRECIABLE

To make the objective perceptible its needs to be broken down into smaller parts that are faster achievable and contribute to the long-term goal. Let’s try to switch up our objectives once more.

“Participants map out concrete weather phenomena that lead to human displacement in a 30-minute session with youth from affected groups.”

REFINABLE

Finally, with CLEAR objectives need to re-evaluate during the process and modified as necessary. This does not lead to a refining of the objective before the training but challenges you keep an eye on them while you facilitate the sessions.

I have used SMART for most of my trainer practice but lately started to combine it with CLEAR. I find a combination of both boosted my objective setting process and simplified the creation of the learning journey, about which we will speak in the next part of the ‘How to plan a training’ series coming next November.

But before I let you go, I want to warn you of some risks and traps along the way. The most significant and most important is that you have to help your client to have more realistic expectations. There is so much you can put into a two-hour workshop, and that includes fixing the corruption of the pharma industry. 😉 It is further helpful to check in with your clients once you defined all objective to ensure you cover what they expect.

A small tip more for your personal life: You can use the technics of SMART and CLEAR to set goals for your life effectively. It helps you to set more realistic goals and to avoid the frustration when “I want to run a marathon tomorrow” did not work out.

I hope you could get something out of the post that helps you to improve your trainer practice. Feel free to leave me a comment if you disagree or have any question and it would help me out if you like and share this post with our fellow trainer friends!

Love and appreciation,

Anuschka

Why we all discriminate – Method of the Month: Sticker Discrimination

As trainer and facilitator, we often face complex concepts like discrimination and we uhm and ah about how to facilitate a personal reflection on such a difficult topic with our participants. We want to avoid platitudes like “I do not discriminate as I believe in equality”, “Only people who are racist/sexist/abelist/… discriminate” or “I am a woman/PoC/… so I cannot discriminate”. Many participants have a hard time to think beyond these platitudes and are unconscious of one basic fact: As we live and operate in a discriminatory society, we are likely to act unconsciously in discriminating ways

A simple discussion of different definitions will certainly not do the job. On the contrary, a full-on simulation might not fit in the allocated time slot within your training. This is where my first Method of the Month will come to your rescue! The method is based on “Labeling Ourselves” publish by… in ….

“Sticker Discrimination” is a short and impactful simulation that confronts participants with rules and tasks that are aimed to trigger discriminative behaviours. After mixing the participants up by standing up and walking around, the trainer invites them to close their eyes. She walks around and marks the participants’ foreheads with different stickers. Some are left with no stickers. She now instructs the group to form smaller groups according to two rule: they are not allowed to speak and can only create groups of maximum four people. [Pro tip: Variate the number of people so participants can not split evenly]

31655602_1627563393958969_3419035396317642752_o

Participant waiting with closed eyes. [picture: IUSY]

Once the groups are formed, they are tasked to think of why they grouped up, what they have in common and what makes them better than the other groups. After the presentation of each group, the trainer calls the participants back in the large circle to facilitate the debrief. She helps the group to reflect on the process of the group building and forming a group identity. Did they follow a particular strategy? Where there moments of comfort or discomfort? How did it feel when someone was left out? How did this person feel? What were the power structures within the process? What did the stickers represent? Why did they stick to/break the trainer’s rules? How does this simulation relate to reality and the societies we live in?

I used this method in my last training “Equality start with us! – Youth promoting inclusive societies and global citizenship and opposing violent extremism” for the International Union of Socialist Youth in cooperation with the Council of Europe. We were already on our second day, and it was the start of several session on the topic of discrimination that would be later connected to the reality of refugees. On our first day, we worked mostly on the issue of identity which my co-trainer and I used as foundation and point of reference for the debrief.

31485979_1627563417292300_2389409775575105536_o

Participants trying to form groups without speaking. [picture: IUSY]

In my opinion when facilitating this method the trainer already needs to be established and recognised by the group as a leader. Otherwise, the power of the rules is weakened, or participants who are facing discomfort might just leave the exercise. We choose to use a harsh and authoritarian tone to instruct the participants and not to react to approaches during the group phases. Further, we interrupted or shut down groups during their presentation and even skip one group’s presentation entirely.

Looking at the outcomes, we as facilitators were surprised that even so, we worked with a group of left-leaning political activists how ‘easily’ they fall into behaviour patterns that embraced the rules given. Not one person broke the rules or rebelled against us as facilitators. The initial group forming happened really fast, and most participants expect that they finished their task, but participants did not realise that one person was left alone. This lack of awareness shocked many of them. They were so eager to figure it out and fulfil the trainers’ expectation, that they did not question the broader context of the exercise. In the debrief the participants were able to relate this to their real life and the fact that many people do not discriminate consciously but blindly follow the rules and authorities and therefore establish and maintain a system of discrimination.

31641872_1627564967292145_8328328988699131904_o

Participants are discussing how the exercise relates to discrimination in real life. [picture: IUSY]

Possible variations could be replacing the stickers with roles or attribute. The roles could relate to the context of the living reality of the participants like professions, gender, sexuality, education, religion or ethnicity. The attributes could be different forms of greetings or movements. If you are working with a multi-ethnical group, the rule of not speaking could be replaced by only speaking in one’s native language. The debrief could be connected to a group work phase, in which the participants have to relate the structures of the exercise to common hatreds like sexism, ableism and racism.

I am convinced that “Sticker Discrimination” is a powerful and with 30 minutes relatively short exercise on discrimination. It offers a different approach to understand the mechanism of especially structural discrimination and by being non-verbal invites shyer or participants with a more substantial language barrier to take an active role in the group‘s learning process. The discomfort experienced during the exercise enables a more profound reflection.

As always leave me questions and remarks down in the comment section below. I truly appreciate you taking this time out of your day to discover the world of Affective Facilitation with me. And I would be of course delighted if you decide to share it with someone!

Love and Appreciation,

Anuschka


A Trainer in the Candy Store

As trainers, we struggle with quite a few challenges. I will share with you some tips and tricks for the most common difficulties trainers and facilitators face. Today let’s talk about a quirky one; The wish to cover it ALL!

There is all this information that we dig on a particular subject that lays like small shiny diamonds before us, and we are tempted to share it all in our 45 minutes img_1008session. Or you just finished this facilitation book, and there are a million and one methods you want to try out NOW! And sometimes it is the anxiety of not covering enough to make it an active and engaging training.

As important as this urge is because it shows how passionate we are about our trainer work, it bears several problems and risks. An essential one is we could overwhelm our participants with both information and methods and deprive them
of the space to learn and grow on their own. We could even slip back into facilitating in a formal educational way and shooting our participants right back to their school time. We also could risk to lose them and run through topic after topic just touching them superficially.

I for sure made this experiences a million and one times! Over time I came up with ways to restrain this urge and use it to my advantage!img_0979Strategy No. 1 – Go big and bold!

When we led our trainer-brain play around it comes up with the most astonishing ways to structure workshops. Let’s use this creative tickle and go big and bold. Plan a img_1007blueprint session outline with EVERYTHING. Pack all the methods and subtopics in there and do not care about the time frame. Pretend you can keep your participants forever.

Now that our first urge to stuff it all in is satisfied look at the blueprint you came up with. What are the highlights? What sounds the most fun? What are details you can leave out? What might not work out as you imagine it? Go with your gut and trust your educational instinct. Cut back until everything fits nicely in your timeframe and feels right for you. And the best about it is, that you just created a huge stash of session elements which you can use in another training!

IMG_1009

Strategy No. 2 – Stick to your session objectives and learning outcomes!

Do you remember that I wrote in my last post about that at the beginning of every planning process you carefully draft session objective and learning outcomes? Use them to your advantage. The approach is a bit more technical but works well if you are particularly passionate about a topic.

Write all your objectives and outcomes on a sheet of paper or in a file on your computer. Now go over each of them and list all the information needed to achieve them. Be strict with yourself and stick to the essential. Keep all the left out diamonds for another workshop.

img_0979

Strategy No. 3 – Allow yourself a Plan B!

This strategy is an excellent approach for when you have this one method or exercise that you at all cost want to try out, but it does not fit into the session too well. Plan your session straight forward and put this tiny delicious extra as an additional point on your trainer agenda. Mark which planned exercise could be replaced with it.

While you facilitate, sense if it the group would be open for it and if the time allows to slip it. The Plan B exercise could turn a workshop around completely and help a group that is stuck in its process. Also, it gives you a buffer exercise if the participants work faster than you anticipated.

IMG_1009

Strategy No. 4 – Put on your participants-hat!

img_1012Remember the four hats from my last post? Now it is time to put on your participants-hat! It will help you to calm down your trainer mind and heart, which
are overflowing with ideas and excitement.

Start with looking at the information you have about your participants. What is their (organisational) background? Will they feel comfortable with the methods you chose? Also, think about their interests and expectations. Just because you are utterly fascinated by one aspect of the topic does not mean they are interested in it at all. It is further essential that you make space for self-exploration and -learning. Remember, nonformal education is all about the participants!

img_0979

Strategy No. 5 – Let’s get creative!

Strategy No. 5 is definitively my favourite approach! Use methods of Visual Facilitation to illustrate the information and aspects which are not directly covered in the session. As a trainer, we often forget that there is more to a venue than the room and setup we work in. It is important that we use every space and thing given to us.

For example, create posters and flip-charts and set them up outside your workshop room. This way your participants can use the time before you get started or during the breaks to discover the exhibition and get an additional inspirational boost. img_1010Create exciting handouts or even a small magazine. The possibilities are endless!

How about creating a Tree of Curiosity? Hang a drawing of a tree up on a wall or pin board. Prepare a bunch of leaves that you tape all over the branches of your tree. One side of each leave has a title and the other some information about it. Make sure you have multiple of each. Encourage your participants to pick leaves that they are interested in it. This way they have something they can learn from but also take with them as a reminder. For you as a trainer, it also comes handy if you have a workshop over several days. You could see a pattern in the topics they picked and adjust your training in accordance.

IMG_1009

In this post, you saw that there are many ways to keep in check your inner trainer when she wants to go wild on a topic. You can approach the subject more technically by sticking close to your objectives and refine your participants-focus. You can add additional exercises into your training outline as a bonus for yourself. Or you go all the way. Create a giant blueprint session or grab deep into the Visual Facilitation treasure chest!

Whatever way you choose, remember each session is not about you but what you can do for and with the participants!

Do you have other techniques to tackle the wish to cover it all? Or do you struggle with something else and are curious how I cope with it? Let me know in the comments below or on social media. I love to hear from you!

Let’s facilitate change together!

How the heck do you do this? – Start of the ‘How to plan a Training’ series

Ever wondered how the trainer of the workshop you are sitting in right now came up with the methods she is using? Or do you know the overwhelming feeling that can overtake you as a facilitator when you get a new topic and do not know where to start?

img_0977-2I know both feeling quite well! Over time I developed a method to plan each of my training.

In this upcoming series of blog posts, I want to give you some insights into this planning process. I will show you how to get to all the information you need to get started, walk you through the steps to design a holistic learning journey for the participants and choose the methods that ensure the wished outcomes.

Of course, I will not dump all this information on you in just one post! The first part of this series will give you a general overview of the different steps, along side some tips and tricks.

My planning process consists of four main stages. Everything begins with the topic or theme of the training. From there, I develop the training objectives and learning outcomes. The second step is to take the objectives and create a learning journey for the participants. Out of this roadmap, I identify the thematic building blocks; to finally choose the concrete methods that are the backbone of the training.

But let’s start at the beginning!

img_0979

From the topic to the training objectives and

For me, this first phase is the most client or host intensive step of all four. You will want to take as much time as needed with your partner to break down the topic as precisely as possible. Do not let them escape with: ‘The training shall be about feminism.’ If they did not formulate them themselves, you should help to define the objectives and to set learning outcomes as tangible as possible.IMG_0976

Besides the thematic information, it is crucial in this step that you get as much information as possible regarding participants, time and place of the training and the background of your partners themselves, like general aims and objectives of organisation or company. A training for five participants looks entirely different from one for fifty. Also, it is necessary to know the age group and background of the participants.

Try to put yourself as soon as possible in the shoes of the participants. While you are discussing the objectives and outcomes with your partners, always try to imagine the participants’ expectation alongside. There is a ton of methods on how to define objectives. It will be the subject of a detailed post later.

img_0979

From the objectives to the design of a learning journey

This step is all about the participants and their experience during the training! It is important to create an experience as smooth as possible, where the predatory effortIMG_0989
is not visible to the participants. Therefore I always aim to find a narrative for the training, a story the group will build together. To do so, you need to identify how the
objectives build up on each other and what is important to experience before you open another aspect. It might be necessary to go back to the objectives at that point to adjust them.

Like in every good story always make sure there are no loose ends, and everything serves a purpose. The participants do not to see the connections immediately each time, but a final Aha-moment is crucial. We will come back to this in a later post of this series.

Pro-tip: If I have to plan a training over several days, I choose a topic for each day.

img_0979

From the learning journey to the thematic building blocks

After outlining the learning journey for the participants, focus on the topic and thematic of the training. I start with identifying thematic clusters along the way and structure the informative material accordingly. List the key terms and concepts thatIMG_0976 need to be established and the skills that need to be developed or extended.

Sometimes you might discover that the logical connections between the individual blocks do not work. In this cases, you need to go back and revise the design of the learning journey. The clearer and more natural the structure is the fewer surprises you will end up having during the facilitation. This whole step will be covered in more depth in the fourth part of this series.

img_0979

From the building blocks to the selection of methods

Now the fun part begins!! I love to go through methods and pick the diamonds for
each training I facilitate! Sometimes, I finally find the right spot for the new methods IMG_0990I wanted to try for so long! What a sweet feeling

But, as with everything nice, there is the backlash as well! To minimise the risks, you should review your first selection of methods and ask yourself some questions. What
learning types do the methods address? What personally types? Do they work naturally with the rest of the session ?? Do they achieve the objectives and generate the learning outcome? But also, will the participants and you have fun? Is there enough time and space for down time? And, are you brave enough with your selection? 😉 We will speak about this in all extend in the fifth and last part of this series. I am already excited!!

Pro tip: Because I never know how exactly the group and the on the spot mood of each session will be, I always bring some Plan B methods alongside to the training!

img_0979

So there they are my four steps on how to tackle any training. They are like four hats I put on. I start with the hat of the client or host and define what the aims of the img_0976training are and what information is needed. Then I put on the hat of the participants and ask myself what will be the experience during the training. With the topic hat in the third step, I discover what information and which skill is need when. And finally with my favourite hat – the hat of the methods – I choose which method will serve the participants and their learning the best.

How about you? How do you tackle a new training, workshop or session? Let me know in the comments below. Which of the four steps would be your favourite?!

Let’s facilitate Change together!